
This post is now out of date — see the latest update, here
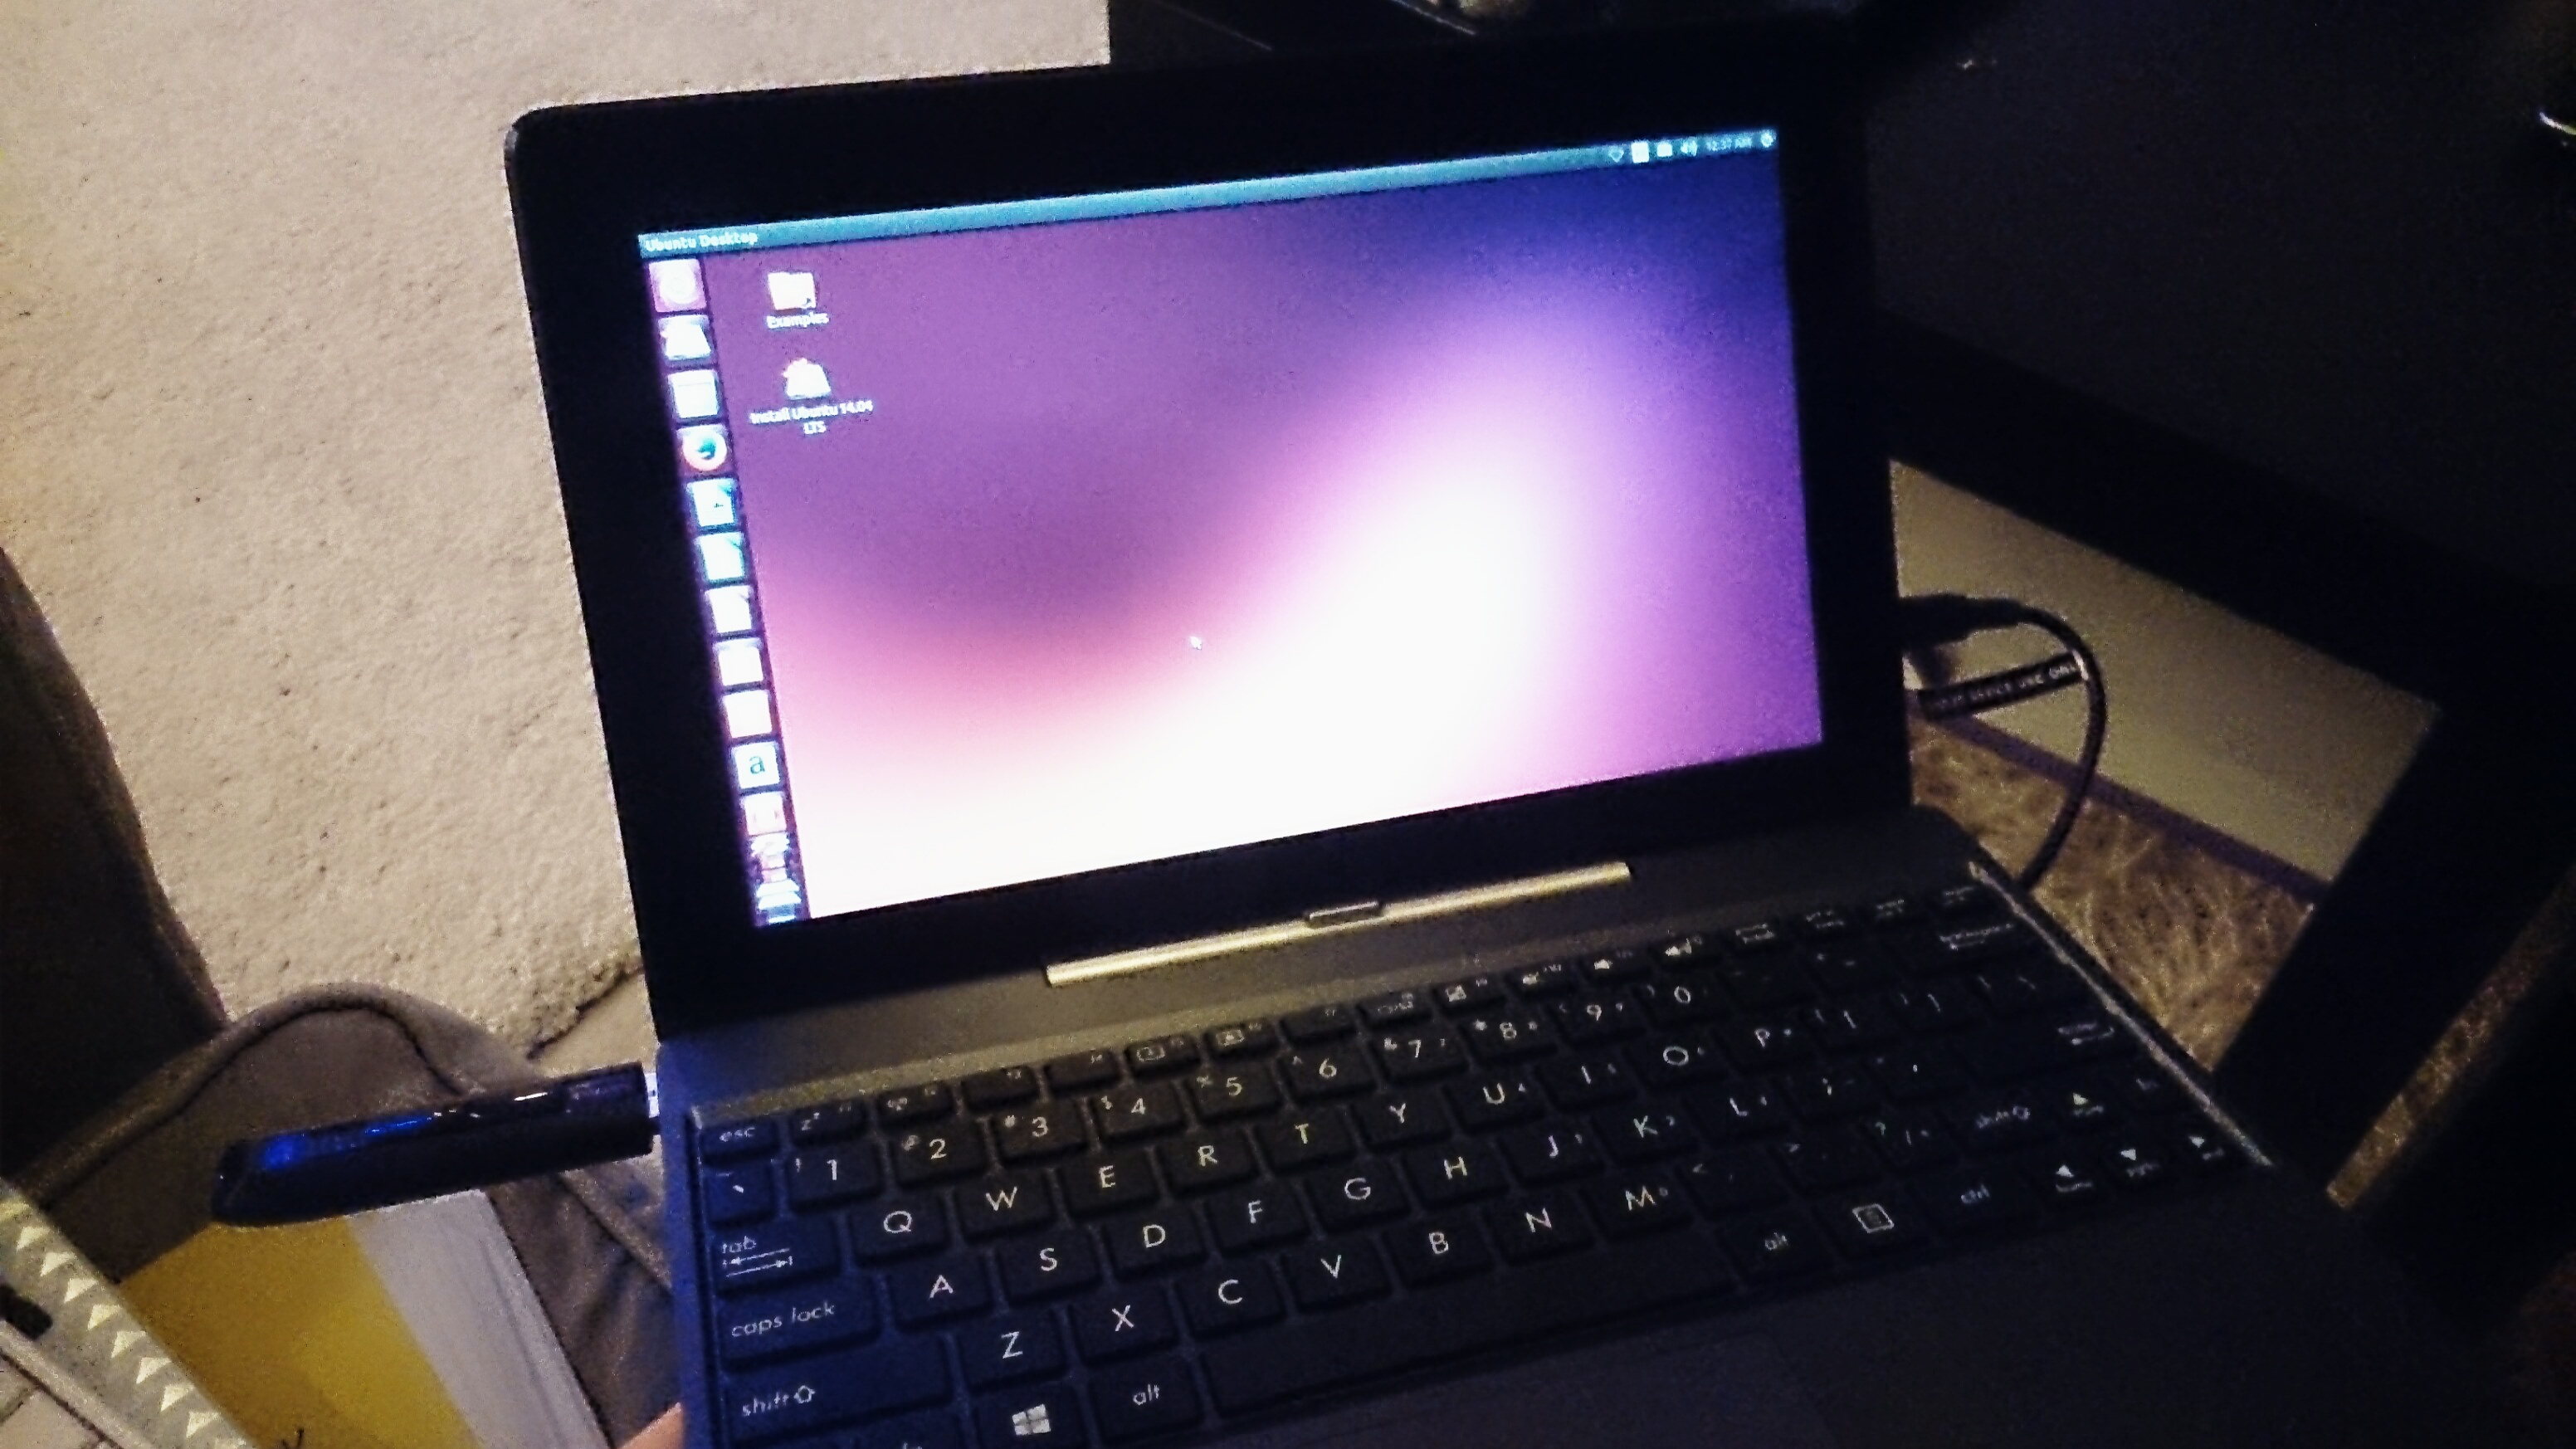
The T100 is a nice little convertible tablet/netbook.
My aim is to get a “perfect” Ubuntu installation on the T100, such that it can be used successfully as a daily machine in both netbook and tablet modes.
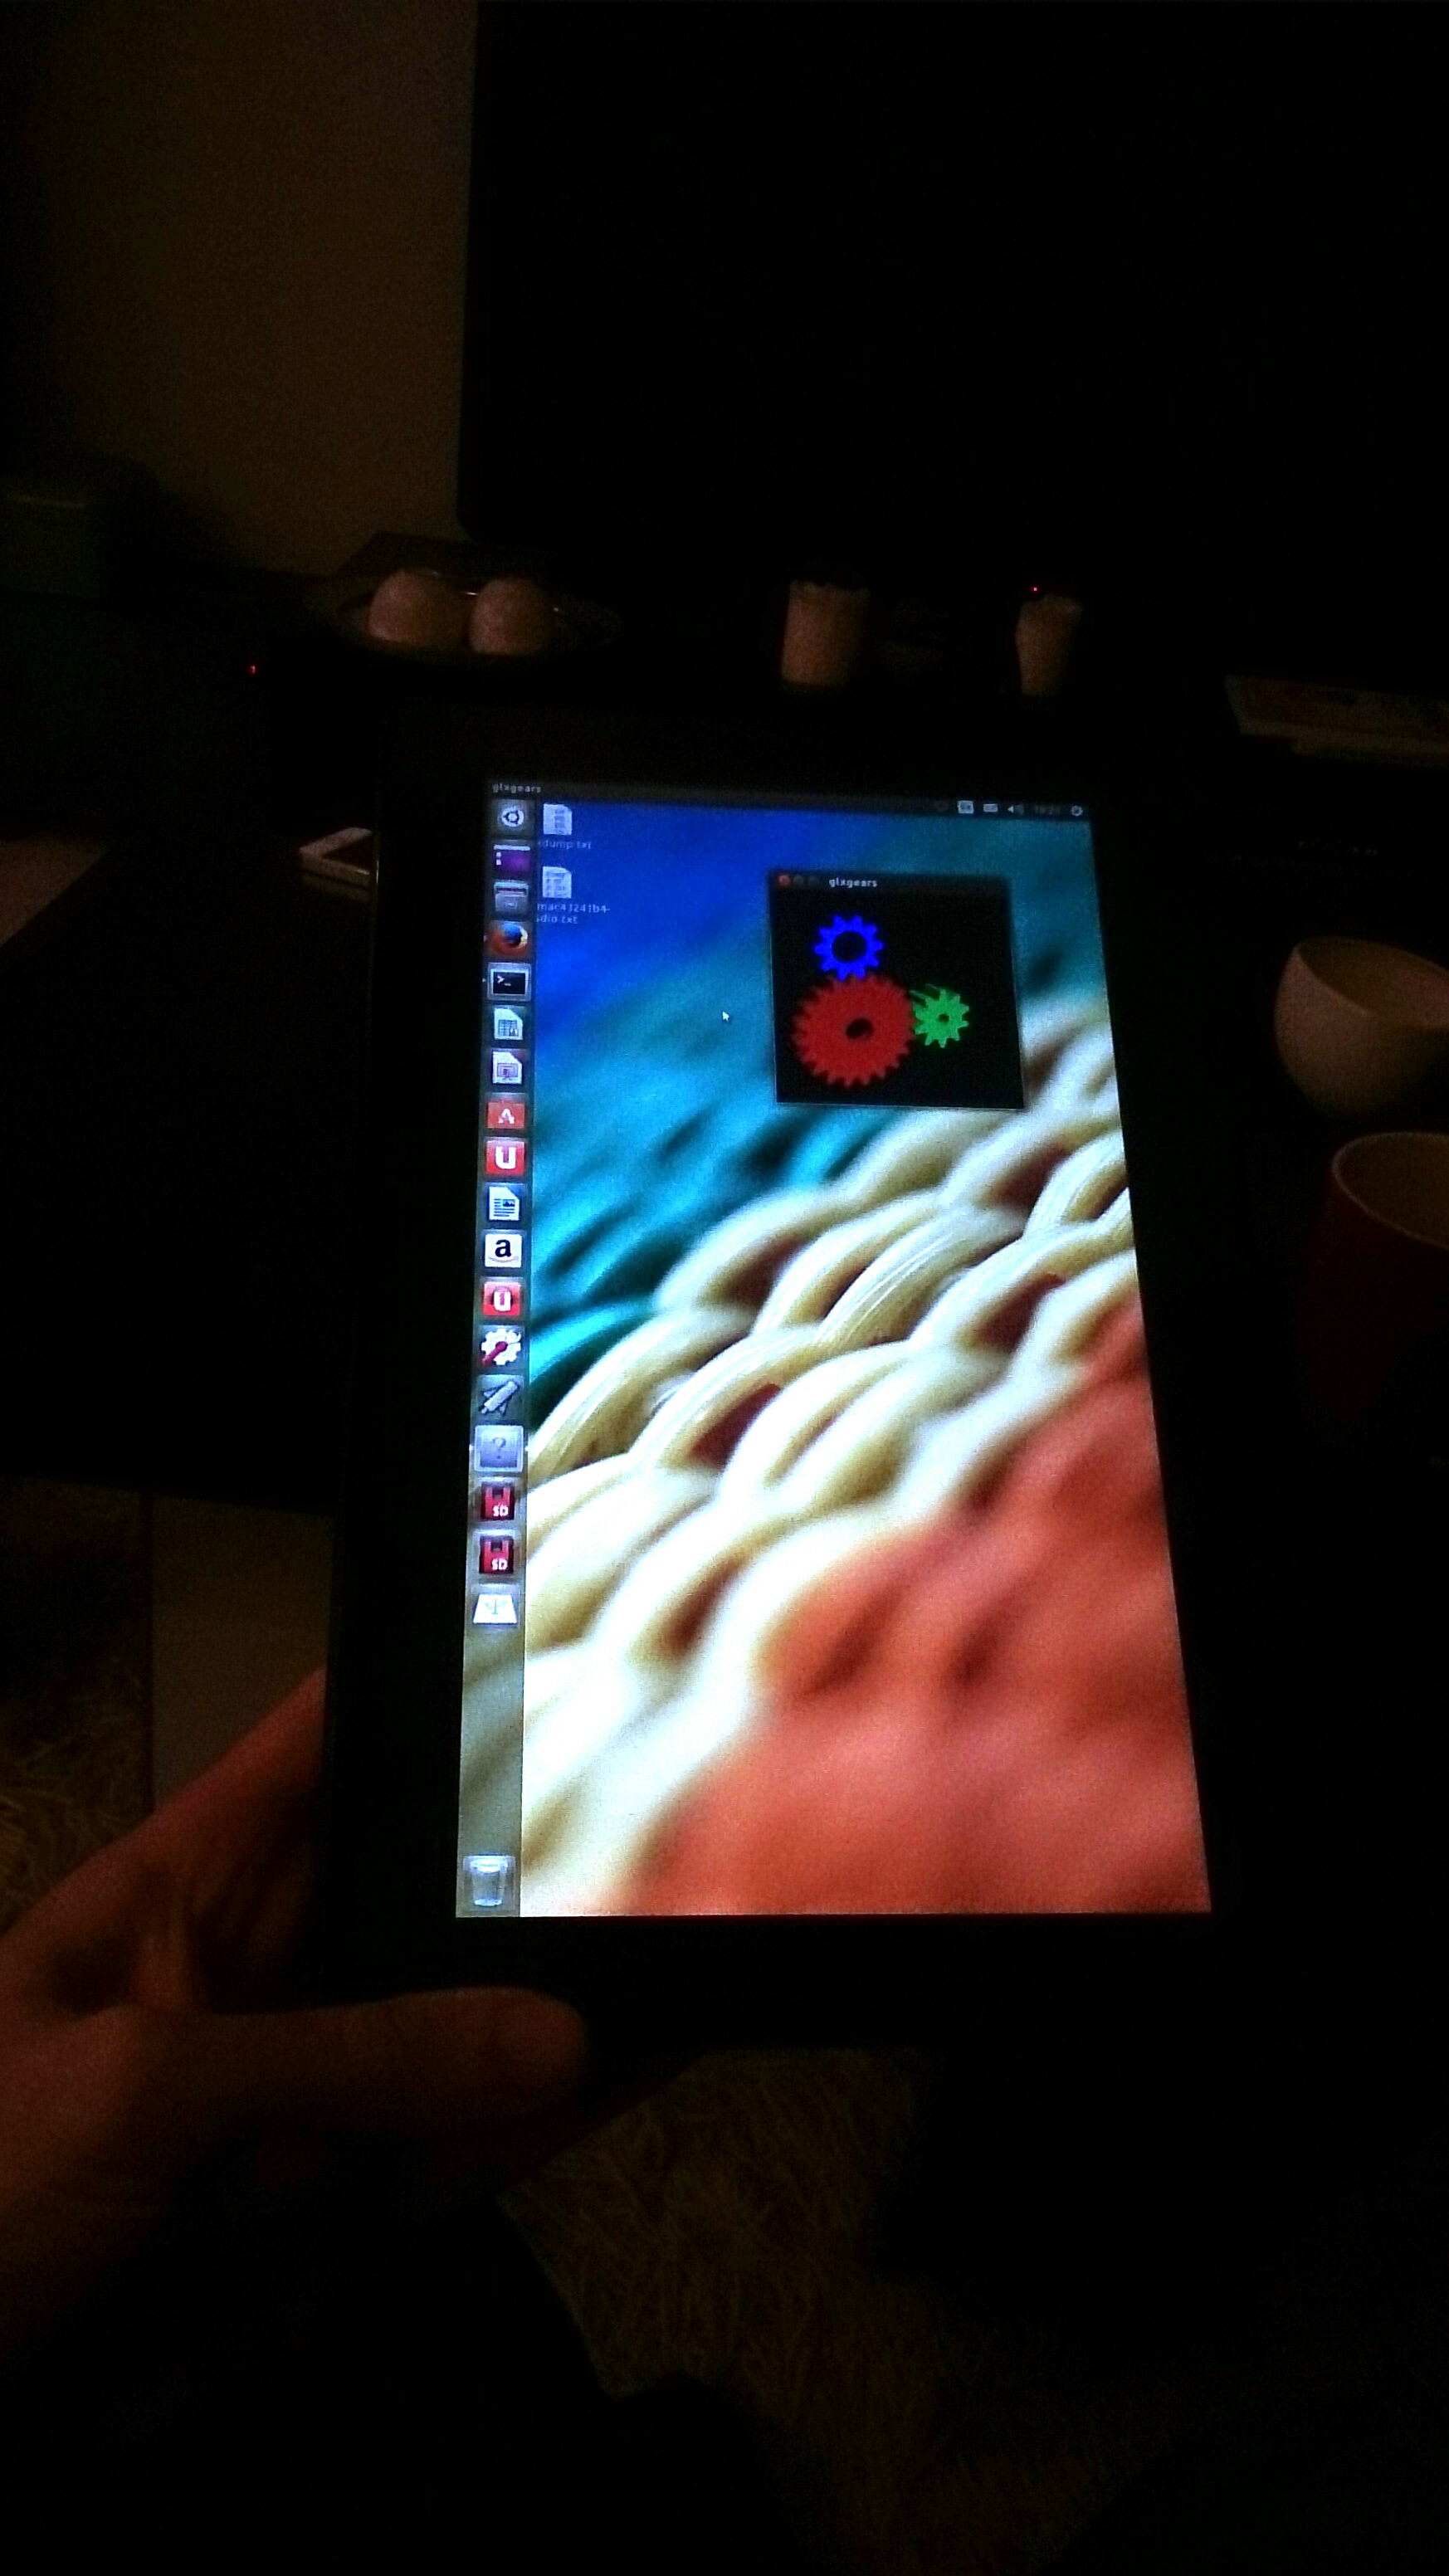
GLXGears in tablet mode
Unfortunately Linux support right now is quite rudimentary, and installing it requires us to jump through a few hoops. The situation is improving rapidly however. So I will keep updating this How-to as new drivers become available and things improve. See the latest update.
Warning
Eventually I expect hardware support for the T100 will be excellent, but we are not there yet. In order to get the best support possible, we will be using bleeding-edge builds and the latest Linux kernels. If you’d just prefer an easy life, come back in October and just install Ubuntu 14.10.
That said, this little convertible is a lovely machine, and Ubuntu/unity works very nicely on it — finally Unity has a purpose! The more people get on for the ride now, the quicker we can test and iron out bugs.
*** This post will constantly be updated as in-kernel support improves ***
Current status (updated 23/03/2014)
I’ll update this whenever I manage to get new things working. I will only add items to the How-to below that are confirmed to work well.
- Graphics: Working with accelerated (3D) graphics 7/10
- Wifi: Working, but often drops connection [working on improving this] 6/10
- Touchscreen: Working, with multi-touch out of the box 10/10
- Sound: Working, with patches 8/10
- SD card reader: Working, some configuration needed (thanks akira) 9/10
- Battery monitoring: Working, with patches 8/10
- Tablet keys (Volume up/down etc): Not yet working 0/10
- Power management (Suspend/resume): Not yet working 0/10
- Orientation sensor: Not yet working [currently testing] 0/10
- Backlight & ambient light sensor: Backlight not adjustable. Light sensor works with custom driver 5/10
- Touchpad: Working, no multitouch yet 8/10
- Shutdown / reboot: Working, with patches 9/10
1. First steps: Preparing for the Ubuntu Install
First things first, update using Asus LiveUpdate to the latest “BIOS” available. At the time of writing, that is v304. Do any backing up of Windows / recovery partitions. I’ll leave the details of that up to you.
Before we attempt to boot Linux on the T100, we need to do some preparation, so start in Windows. Download the latest daily AMD64 build of Ubuntu 14.04 from here.
Download the Rufus USB bootable image creator, and “burn” your downloaded ISO to a spare USB stick. In Rufus, for “Partition scheme and target system type”, choose “GPT partition scheme for UEFI computer”. For “File System”, choose “FAT32″, and leave the rest at default. At the bottom, check “Create a bootable disk using: ISO Image” and select your downloaded Ubuntu image, then hit “Start”.
When your USB stick is ready, close Rufus. It should now be browseable in Windows. Browse to the EFI\Boot directory, and place this bootloader (named bootia32.efi) there. This bootloader was compiled from source using the latest Grub2. If you don’t trust random downloaded files from the Internet (and you shouldn’t), you can find the instructions for building it yourself here.
2. Booting the Live Image
Now, insert the USB stick and reboot to the firmware (BIOS). You can do this in Windows by holding shift when pressing “restart”, then touching Troubleshoot → Advanced Options → UEFI Firmware Settings → Restart.
Once there, disable SecureBoot, then visit the boot options, and ensure the USB stick is the first in the list.
Press F10 to save settings, and after a few seconds you will be in the GRUB bootloader. Before the timeout, immediately hit CTRL-ALT-DEL. This will reboot the computer again, but this time you will have the laptop’s native resolution (rather than being stuck at 800×600 from the “bios”).
In the GRUB menu, highlight “Try Ubuntu”, and press “e” to edit it. In the editing screen, scroll down to the command line options, where it says “quiet splash”. Delete “splash” and replace it with:
video=VGA-1:1368x768e reboot=pci,force
Then press F10 to boot. You should get all the way to the Desktop.
3. Installing the distro
Click the “Install Ubuntu” desktop icon to install Ubuntu permanently.
The partitioning scheme you choose is up to you — but you will need to preserve the EFI partition, so don’t just partition the entire disk for Ubuntu.
In addition to the EFI partition, I prefer separate /, /home and /boot mount points; but that is up to you. You could squish down the Windows partition and created the additional partition(s), or just delete the Windows partition altogether if you don’t need it.
When done, reboot, leaving the USB stick in.
4. First boot
Ubuntu won’t boot yet. We’ll need to compile our own bootia32.efi to use with Grub. To do that we really need a wireless connection. So we’ll boot manually, fix up wireless, and fix Grub.
Boot back to the Grub welcome screen on the USB stick. Hit ‘c’ to drop to a Grub command line.
You’ll need to provide Grub with the path to your kernel and initrd to boot. First, the path to the kernel:
linux (hd2,gpt5)/boot/vmlinuz-3.13-xxxx root=/dev/mmcblk0p5 video=VGA-1:1368x768e reboot=pci,force
Here, (hd2, gpt5) refers to the fifth partition on the third disk (Partition numbering begins at 1 and disk numbering begins at 0). This will vary depending on how yo uinstalled and your T100 model. On my 32GB model, Grub assigns the USB stick as hd0, the read-only recovery flash chip as hd1, and the main internal flash as hd2. gpt5 is the fifth partition, but it will depend on how you installed.
Fortunately, grub has good auto-completion features, so you can hit
The root=/dev/mmcblk0p5 will also depend on the partition you installed to. It will be your root partition. Unfortunately this can’t be auto-completed, so if you can’t remember your partition setup, you’ll need to try by trial and error.
To complete the line, press Enter.
Then you need to specify the location of your initrd. This is easy, it’s in the same place as the kernel:
initrd (hd2,gpt5)/boot/initrd-3.13-xxxx
Then Enter.
Then boot with:
boot
With luck after hitting Enter, you’ll boot through to Ubuntu. If not, don’t be disheartened — keep trying.
5. Enabling wifi
To get further, we’ll need wifi. However internal wifi on the T100 isn’t terribly reliable under Linux yet. If you have access to another wifi dongle, you might want to try that until you’re fully set up.
The driver is already included, but it needs some firmware and a copy of your system’s wifi nvram:
- Grab the Wifi firmware here (from the Linux-wireless repository). Copy it to /lib/firmware/brcm/brcmfmac43241b4-sdio.bin
- The NVRAM is difficult to get right now, as 32-bit EFI runtime services aren’t yet available on 64-bit. But you can use my NVRAM — get it here and copy it to /lib/firmware/brcm/brcmfmac43241b4-sdio.txt
You’ll now need to reboot using the same procedure again, and wifi should be working.
However, I found wifi performance to be very poor — there are some bugs in the driver. This is improved somewhat with the latest kernel, which we will upgrade to in a later step. I managed to improve performance somewhat by using the NVRAMs from other platforms, and splicing in some of the missing variables. You can see my tries here. In all cases, copy them to /lib/firmware/brcm/brcmfmac43241b4-sdio.txt , and reboot or unload/reload the wifi driver:
sudo modprobe -r brcmfmac

sudo modprobe brcmfmac
If you find a firmware/nvram combination that works really well, please share.
6. Completing the installation
We can’t keep rebooting like this… so let’s fix Grub. This assumes you now have a working Internet connection.
We’ll need some build tools — install them:
sudo apt-get update && sudo apt-get install git bison libopts25 libselinux1-dev autogen m4 autoconf help2man libopts25-dev flex libfont-freetype-perl automake autotools-dev libfreetype6-dev texinfo ia32_libs build_essential
Then get the Grub source:
git clone git://git.savannah.gnu.org/grub.git
Now build it:
cd grub

./autogen.sh

./configure --with-platform=efi --target=i386 --program-prefix=""

make
And install to efi:
cd grub-core

sudo ../grub-install -d . --efi-directory /boot/efi/ --target=i386
This will create a directory, ‘grub’, in your EFI partition.
We want to copy the grubia32.efi from there to the location Ubuntu created during installation:
cd /boot/efi/EFI

sudo cp grub/grubia32.efi ubuntu/grubx64.efi
This should be enough to allow you to boot from the “ubuntu” option in your EFI firmware.
Before you boot, let’s add the default command line options to Grub.
Open /etc/default grub in a text editor:
sudo nano /etc/default/grub
And edit the GRUB_CMDLINE_LINUX_DEFAULT exactly as we did before. When done, hit ctrl-o to save then ctrl-x to exit. Then, to update Grub:
sudo update-grub
Congratulations! you should now be able to boot/reboot directly to the Ubuntu desktop!
7. Upgrading to the bleeding edge to improve hardware support
There are still a lot of things to get working. The best way to improve hardware support further is to use the latest development branches of the kernel.
Unfortunately (as at the time of writing), even the latest development Linux kernel (3.14-rc5) lacks some key hardware support for Baytrail tablets. But we can improve that by pulling in latest patches for sound. We’ll also compile in a new experimental feature for accessing 32-bit EFI services from a 64-bit system, as we need that for tools like efibootmgr to work. Finally, we’ll pull in the latest wireless fixes and the latest power management changes. We need to power management changes for our battery patch.
I recommend you compile this on a fast desktop computer with a decent network connection. You could do this on your tablet, but it would be extremely slow. For the following instructions, I assume you’re using a recent 64-bit Ubuntu on a desktop. If you’re using 32-bit, you’ll have to change the instructions to cross-compile — I’ll leave that up to you (and Google).
On your compiling machine, install the packages you’ll need to build a kernel:
sudo apt-get install git build-essential fakeroot crash kexec-tools makedumpfile kernel-wedge libncurses5 libncurses5-dev

sudo apt-get build-dep linux-image-$(uname -r)
Then create a working directory, step into it, and download the sources you’ll need:
mkdir kernel

cd kernel

git clone git://git.kernel.org/pub/scm/linux/kernel/git/torvalds/linux.git

cd source

git remote add sound git://git.kernel.org/pub/scm/linux/kernel/git/broonie/sound.git

git remote add efi git://git.kernel.org/pub/scm/linux/kernel/git/mfleming/efi.git

git remote add pmfixes git://git.kernel.org/pub/scm/linux/kernel/git/rafael/linux-pm.git

git remote add wifinext git://git.kernel.org/pub/scm/linux/kernel/git/linville/wireless-next.git

git fetch sound

git fetch efi

git fetch pmfixes

git fetch wifinext
Then merge the updates from sound, efi mixed-mode, power management and wireless onto the mainline kernel:
git merge sound/topic/intel

git merge efi/efi-for-mingo

git merge pmfixes/linux-next

git merge wifinext/master
There are still some patches we need to apply. Step back and create a patch directory, and download some patches into it:
cd ..

mkdir patches

^mkdir^cd

git clone https://github.com/jfwells/linux-asus-t100ta.git
Now apply the patches:
cd ../source

git apply ../patches/linux-asus-t100ta/patches/*
They should all apply without error.
Now we’re almost ready to compile. Before we do, we need a .config file to tell the kernel build system what parts we want to compile. Start by copying over the current one from your T100. You’ll find it at /boot/config-xxxxxx , where xxxxxx is the version of the currently running kernel. Grab it and copy it to the kernel/source directory you’ve just been working in. Rename it to .config .
Now we need to update the config:
make oldconfig
This will prompt you to set configuration for the things that will be newer in this kernel. Select ‘m’ to compile relevant drivers as a module where offered (in particular all the ‘soc’ sound options). Select ‘Y’ to enable EFI mixed mode where offered. Leave the kernel debugging options off.
When done, we’re ready to compile. We can just do it the quick and dirty way:
make clean

make -j8 deb-pkg
The above assumes this is on a quad-core processor with hyperthreading (hence the ‘-j8′, or 8 simultaneous processes). Reduce this number appropriately if you have less cores.
This will take some time (anywhere from 20 minutes to over an hour. If you’re doing it directly on the T100, all bets are off – it could take all day.
When complete, you’ll have a set of .deb packages in the directory above (i.e. in the “kernel” directory). We need “linux-headers-xxxxx.deb” and “linux-image-xxxxx.deb”. Choose the smaller of the linux-image packages, the one without debug symbols. Copy them over to your T100.
On the T100, install the new kernel with:
cd <folder where you saved the .debs>

dpkg -i ./*.deb
Then reboot!
8. Sound
Sound won’t yet be working. First, you’ll need some more firmware. For now, you can grab it from ChromiumOS, here. Unpack the archive and copy the files to /lib/firmware/intel .
The drivers are in a bit of a raw state — they expose about a hundred oddly-named mixer and DSP devices to ALSA. We can set some defaults. Grab the defaults file here, and copy it to /var/lib/alsa/asound.state .
Reboot, and force-load the state file into alsa with :
sudo alsactl -f /var/lib/alsa/asound.state restore
For me, my sound still sounds pretty awful. I need to mute the distorted right channel in alsamixer, then at least it is bearable. I also find the CPU runs a bit hot with sound enabled. Let me know if you have more luck.
* please be careful — my sound is permanently distorted, even in Windows now; keep the volume low when testing the various options *
9. SD card reader
The SD card reader works with newer kernels, but the sdhci module needs some configuration. Create a new file:
sudo nano /etc/modprobe.d/sdhci.conf
Then add the following:
options sdhci debug_quirks=0x8000
ctrl-o then ctrl-x to save and exit, then:
update-initramfs -u -k all
Then reboot and the card reader should be working.
9. Other drivers
So far, the only additional driver I have working is the light sensor. Please download and test my driver here.
9. Other scripts
I have made some additional small scripts to improve usability.
Dock scripts: These enable/disable the Onboard on-screen keyboard when you undock/dock the tablet. Set up the onscreen keyboard first in System Settings → Accessibility, then the scripts will enable/disable they keyboard for text fields.
Rotate script: This will rotate the screen and touchscreen when run. You can place the desktop entry on your desktop. We can connect the orientation sensor to this later, once that is working.
Workable… for now.
anyone have a solution to make the launcher appear when you have autohide set and you want to swipe from the edge to bring it up? it doesn’t seem to work
did somework work
Got 3.15.0-rc3 compiled with working battery monitor
can download my compiled kernel here
https://github.com/brainwreck/linux-asus-t100ta/compiled-kernel/
download the files and run
sudo dpkg -i *.deb
reboot and select 3.15.0-rc3+
this will install the kernel and get you a working battery monitor on latest kernel…
i will upload the patch i used tomorrow for the people who want to compile their own kernel and to use for future kernels…
enjoy….
-brainwreck
my apologies its late… correct url is
https://github.com/brainwreck/linux-asus-t100ta/kernel-compiled/
enjoy!
-brainwreck
once again fail on my part… just
git clone git://github.com/brainwreck/linux-asus-t100ta.git
cd kernel-compiled
then dpkg -i *.deb
this will install kernel
sorry for earlier posts… i need sleep
laters
-Brainwreck
this will i
When I choose “Try Ubuntu” after the computer black screen, no response
What should I do
Thanks
当我选择”Try Ubuntu”并编辑启动参数后电脑黑屏没有响应我应该怎做
但愿你能看懂中文。。。
At try ubuntu press e… move to line that says splash and delete splash only add video=VGA-1:1368x768e reboot=pci,force then press f10
did some more work
its seems in the file
/lib/firmware/brcm/brcmfmac43241b4-sdio,txt
on the line devid=0×4374
should be devid=0×4324
i got this from the kernel wifi here
http://wireless.kernel.org/en/users/Drivers/brcm80211
you can see it lists brcm43241 as devid 0×4324 not 0×4374
with devid=0×4374 i kept getting massive error messages but once i changed it i only get
brcmfmac: brcmf_fil_cm_data:failed err=-23
once i changed this most of my error messages went away and i can disconnect and reconnect with no problems
bluetooth still works and wifi connectivity is alot more stable, test it out seems to help me… let me know your findings
also i am using wicd network manager and under advanced settings using the nl80211 protocol, it seems Wext is giving me lots of problems… whereas nl80211 allows me to disconnect and reconnect at will..
any thoughts??
Enjoy!
-Brainwreck
I tried this patch to sdhci.c
http://www.spinics.net/lists/linux-mmc/msg24764.html
After,it seems to be more stable wi-fi connection with no errors,
and can connect to WPA-PSK AccessPoints.
In Step7,it appare :
error: patch failed: drivers/pwm/Kconfig:119
error: drivers/pwm/Kconfig: patch does not apply
error: patch failed: drivers/pwm/Makefile:9
error: drivers/pwm/Makefile: patch does not apply
error: drivers/pwm/pwm-lpss.c: already exists in working directory
My command:
mkdir kernel
cd kernel
git clone git://git.kernel.org/pub/scm/linux/kernel/git/torvalds/linux.git
cd linux
mkdir source
cd source
git init
git remote add sound git://git.kernel.org/pub/scm/linux/kernel/git/broonie/sound.git
git remote add efi git://git.kernel.org/pub/scm/linux/kernel/git/mfleming/efi.git
git remote add pmfixes git://git.kernel.org/pub/scm/linux/kernel/git/rafael/linux-pm.git
git remote add wifinext git://git.kernel.org/pub/scm/linux/kernel/git/linville/wireless-next.git
git fetch sound
git fetch efi
git fetch pmfixes
git fetch wifinext
git config –global user.email “example@example.com”
git config –global user.name “Joe”
git merge sound/topic/intel
git merge efi/efi-for-mingo
git merge pmfixes/linux-next
git merge wifinext/master
cd ..
mkdir patches
^mkdir^cd
git clone https://github.com/jfwells/linux-asus-t100ta.git
cd ../source
git apply ../patches/linux-asus-t100ta/patches/*
anywhere wrong?
The Admin needs to update this post… the patches that are used are already in the new 3.15 kernel do you get the error mesages that they dont apply… i imagine he will get around to it when he gets a chance
@brainwreck
Really? I’m running unpatched 3.15 RC3 and I can’t get audio to work for some reason.
I run sudo make Xconfig to get the graphical GUI for configuration, i believe by default the SOC baytrail codec is not selected, need to make sure it is selected, then the kernel should compile it
once it gets installed it should load it automatically
let me know if you have any more problems/questions..
-brainwreck
To enable sound, need to check this option:
Device Drivers -> Sound card support -> Advanced Linux Sound Architecture -> ALSA for SoC audio support -> ASoC Audio driver for Intel Baytrail with RT5640 codec
and put firmware into right position. see this page “8.Sound”
too complicated to get sound to work for us average folks
i installed the compiled kernel from the chat here, then went to the sound step and did that part but no sound
release candidate 4 is out
Hola podrían hacer un video en YouTube de como quedaría funcionando Ubuntu en el t100ta? Gracias.
Y también podrían hacer un video instructivo con la instalación del mismo para los que no entendemos mucho de los comandos de Linux. Si no es mucha molestia.
Saludos y gracias…
@brainwreck
What patches did you apply to rc3 for battery? I am running rc4 and have things going pretty well but the battery patch is difficult since it seems to mostly be for some serial ACPI stuff which is already included in much different form.
Okay sound just isn’t happening. I have yet to get it to work with this set of instructions.
any word on the camera?
@ jonpry
There is a patch available at bugzilla.kernel.org if you search for t100ta you will see a thread that talks about battery status.. you have to force the overwrite
you can download here
https://drive.google.com/file/d/0B4s5KNXf2Z36SndDQ2g1OV96TG8/edit?usp=sharing
and you have to force the patch
git apply –reject –whitespace=fix patches/*
you will get a couple hunk rejects but everything else should apply cleanly
then compile the kernel and battery should be working
this patch is scheduled to be added to 3.16 kernel
-brainwreck
very quiet in here
I’m working on some stuff in the xda-developers thread. Also maybe hit me up on Freenode in #htc-linux if you want to collaberate.
Wouldn’t it be much easier if you guys summed this up and put it on the Ubuntu wiki @ https://wiki.ubuntu.com/Touch/Devices/T100TA for instance?
Created one real quick @ https://wiki.ubuntu.com/Touch/Devices/t100ta
Intel has release a baytrail android image but it operates with a 64bit UEFI (see https://01.org/). I’m going to try and adapt these methods to make it work. Will post back with update.
anyone out there?
no sound here still, it shows the card in the sound settings but no sound
For anyone struggling with getting sound to work by compiling the kernel, I’ve found an easy way to get it working. Follow the instructions in this guide about the firmware for sound and the alsa state. Then go to http://kernel.ubuntu.com/~kernel-ppa/mainline/ and download the appropriate .deb for 3.15rc2, 3.15rc5, or 3.15rc6. Sound works in these 3 kernels, but battery monitoring does not. Reboot into your new kernel and it should work.
There is no way to get WIFI working in 14.10, i’ve tried three kernels and two drivers but the SDIO module is not even recognized.
brcmfmac just says that the SDIO driver init was not done on boot.
Modprobe brcmfmac does not return anything.
Any ideas?
@Jack, i just did a fresh install today, added the files like this page says and ran the software updater and it popped up after a restart. i did nothing special except use my android sg3 as a wireless connection via usb tether. that got the updates at least
i followed the steps, but i still do no have sound, i even tried what Jim suggested. it just isn’t happening. It shows up as a device in the sound manager but that is all it does
@Jack, for wifi working one of kernels (https://github.com/jfwells/linux-asus-t100ta/tree/master/kernel-compiled, https://github.com/brainwreck/linux-asus-t100ta/tree/master/kernel-compiled) is required. After it installed wifi works in all kernels (even in kernels from ppa mainline) or sometimes in one of them… I think it’s SDIO,usb bug, because T100TA wifi hardware connects via internal usb hub… Sometimes helps: update-initramfs -u -k all, but after Jfwells’s or Brainwreck’s kernels installing.
Thank you very much for this great tutorial. I love the T100, and look very much forward to see ubuntu tablet working smoothly on it (http://www.ubuntu.com/tablet).
I have a few suggestions:
first, the mmcblk0rpmb time out issue is really and truly annoying. I hope someone cares for the obviously faulty initialization of this driver on T100. I get in deadlock situations again and again, where the T100 keeps timeouting maybe for hours (never had the patience). Does anyone have a hint how to avoid that?
Currently I circumvent this by installing a linux on the harddrive and blacklisting mmc-block in /etc/modprobe.d, but that’s really ugly, as this way the linux cannot be run on the tablet without dock.
As described by “Q” before, the efi setup can be fixed a lot easier. Ubuntu manages to add the efi entries, but for it’s 64bit boot code. So the only thing that needs to be done is to replace that file by a 32bit file. I did it this way: using mobile phone net tethering, I installed grub-efi-ia32. This will create the grubia32.efi on the efi partition. To make it work, a quick and dirty way is to
cp /boot/efi/EFI/ubuntu/grubia32.efi /boot/efi/EFI/ubuntu/grubx64.efi
the reason you need to do that is, because efi has registered grubx64.efi as boot file. A more elegant way may be to change the efi entry with efibootmgr, but not checked so far.
Currently I am falling again and again into the mmcblk0rpmb time out hell, so that would be the most important thing to fix, I guess.
The looping mmcblk0rpmb error is fixed with this patch: http://permalink.gmane.org/gmane.linux.kernel.mmc/24260
I believe it occurs only on newer versions of the t100 as it contains an emmc device by a different manufacturer (Hynix) from the one used in earlier models (SanDisk.)
With that patch I finally get a kernel that boots 100% of the time and within a reasonable time rather than the 2 minutes or so that it takes without the patch however personally I’m still having problems with wifi (networks found but unable to connect) and for some reason my audio channels are reversed (left is right).
Someone really needs to get updated information out there about exactly what patches are needed with linux 3.15 as this post is hugely outdated now.
I forgot to mention that the patch from above has to be applied manually (you have to paste the 6 line additions into the relevant section of block.c, without the leading “+”)
I’ve gotten wifi to connect now, using 3.15rc7, no wifi specific patches and the nvram from here with the devid changed to 0×4324.
The problem I have now is with battery monitoring. The patch from this post doesn’t work, and the one posted by brainwreck in the comments leads to a kernel that has only booted for me once, all other tries lead to a lockup <5 seconds in and on subsequent boots an instant and infinite black screen (backlight on) until I reinstall.
Hey all
Yeah the battery monitoring ive put on hold implementing it into the kernel after 3.14rc4 as it seems to break some things i am waiting for 3.16 to come out before doing any more work, there is supposedly going to be some implementation from the intel folks to fix the battery with the 3.16 build, also hopefully the video issues will be fixed so we wont have to pass the video=VGA-1:1368x768e anymore…
il keep crackin away…
Laters
-Brainwreck
All I need now is for someone a little more savvy than I to work out the kinks with the process on the Lenovo Thinkpad Tablet 2. This post has me so excited to see a potential use for this otherwise rubbish tablet but I can’t get past the blank screen after grub, even passing the video settings.
@twisties
Are you passing video=VGA-1:1366x768e? looks like that tablet is 1366×768 and not 1368×768…
let me know your findings…
-Brainwreck
I’ve just tested again and yes, passing 1366, straight to a blank screen still. Man, if I could get this thing running Ubuntu with full touch support, it would suddenly be a useful device.
@twisties
Another thing you can try is video=nomodeset see if that works
-brainwreck
I’ve compiled 3.15 rc8 and it boots and works.
git clone git://git.kernel.org/pub/scm/linux/kernel/git/torvalds/linux.git

cd source

git remote add sound git://git.kernel.org/pub/scm/linux/kernel/git/broonie/sound.git

git remote add efi git://git.kernel.org/pub/scm/linux/kernel/git/mfleming/efi.git

git remote add pmfixes git://git.kernel.org/pub/scm/linux/kernel/git/rafael/linux-pm.git

git remote add wifinext git://git.kernel.org/pub/scm/linux/kernel/git/linville/wireless-next.git

git fetch sound

git fetch efi

git fetch pmfixes

git fetch wifinext
git merge sound/topic/intel
git merge efi/efi-for-mingo
git merge pmfixes/linux-next
git merge wifinext/master
make oldconfig
make clean
sudo make -j8 deb-pkg
I did all the git commands in the OP, but didn’t apply jfwells’ patches. There were some git conflicts to resolve with the pm-fixes and wifi-next repos.
I manually applied this patch for the mmcblk0rpmb errors.
It boots successfully
+ Boots in 20 seconds without mmcblk0rpmb errors
+ Touchscreen works no problem
+ Shuts down properly without having to hold power button
+ SD card reader works
- Wifi not detected, using external dongle
- No sound (I haven’t done anything with .so files)
- No battery monitoring
- No screen brightness adjustments
- No suspend/hibernate
- No webcam
? Webcam light is permanenely lit
? Touchpad works, but no scrolling
Still no luck, cheers for the ideas though.
^ BRAINWRECK
Once you have a fix for the battery monitor + mmcblk please post the compiled kernel like you did before. My only linux machine is the asus tablet with limited space (i kept the win8 partition) so I can’t build my own kernel :/
Thanks in advance!
kenbw2, Try not applying the wifinext patch, download nvram from OP, place into /lib/firmware/brcm/ and change the devid line in the nvram file to 0×4324
It worked for me with rc7 so hopefully so work for you with rc8. Not sure how realible it will be as I haven’t spent much time using it but it finds networks and connects to my WPA AP. Without the devid change no connect.
If that still doesn’t work, I noticed the nvram file has some odd unprintable chars at the start which I removed (even though they’re also in the copy given by EFI). Maybe try that (you can see them in nano if I remember correctly)
twisties, when editing the grub line try removing the whole “quiet splash” part, not just splash. That should hopefully at least give you some info rather than just a blank screen.
Until I did that I didn’t know that the reason my t100 kernel wouldn’t boot half the time was due to mmcblk0rpmb errors
Hello all!
I have been following this thread for a while and have successfully installed Gentoo Linux on this netbook and it’s running fantastically!
My only annoyance (other than lack of suspend… grr) is the fact that no matter what I try I cannot get Bluetooth working. I’ve applied the patch supplied to add the device IDs, tried fiddling with the /dev/ttyS0, 1, 2 & 3 and nothing works.
Could anyone confirm the exact list of modules / kernel options needed in order to get bluetooth working on the T100TA?
Thanks in advance!!
Chris
CHRISTOPHER, can you get me your kernel config?
@Ardian:
http://paste.ubuntu.com/7629256/